Pencil Shading Techniques: Tips for NATA Drawing

Shading is an inevitable part of NATA drawing. Pencil shading is a technique that allows your sketches to appear more realistic. This will help to capture two-dimensional images in the paper without losing its original essence.
With shading, you can easily depict the depth, character and dimensionality of your drawings, giving a real-life look to it.
This method works well if you want to depict a range of darkness. Darker shades are given to portray stronger areas, while lighter shades help to illustrate more delicate areas.
There are lots of methods with which you could shade your drawings. It is the delicate process of understanding space, depth, light, shadow, and, most importantly, creating real-life images with 3D objects.
This article will cover some of the essential aspects of shading and how to improve your drawing.
Essential pencil shading techniques for NATA Exam
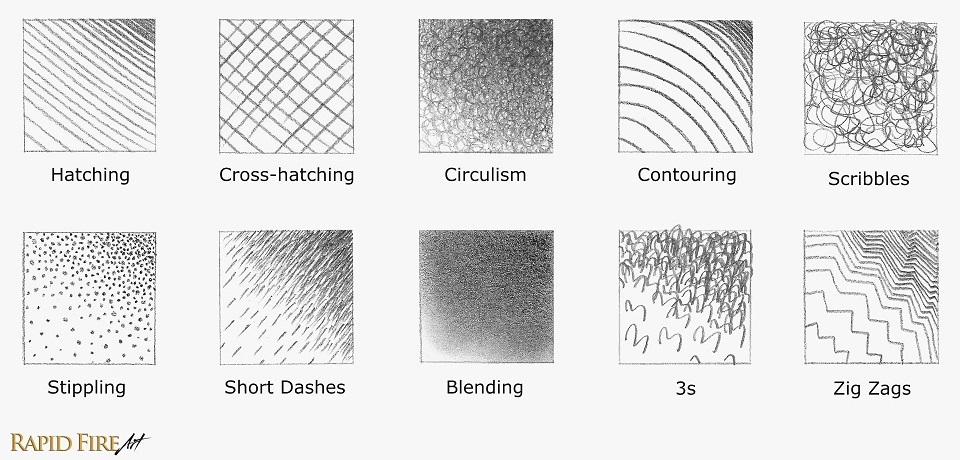
1. Hatching

This is one of the most popular techniques used for shading. In hatching, a set of parallel lines are drawn usually in the same direction, often at an angle.
Darker shades are obtained if the lines are drawn closer by applying more pressure. Leaving more gaps between the lines and applying less pressure will result in a lighter image.
Remember that it is vital to have consistency in the distance that you are leaving between each line and their angle.
While the process appears to be a time consuming one, you will be able to do hatching quicker with time and practice.
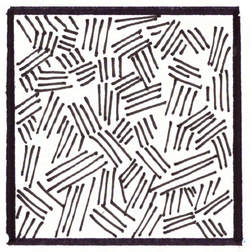
2. Cross-Hatching
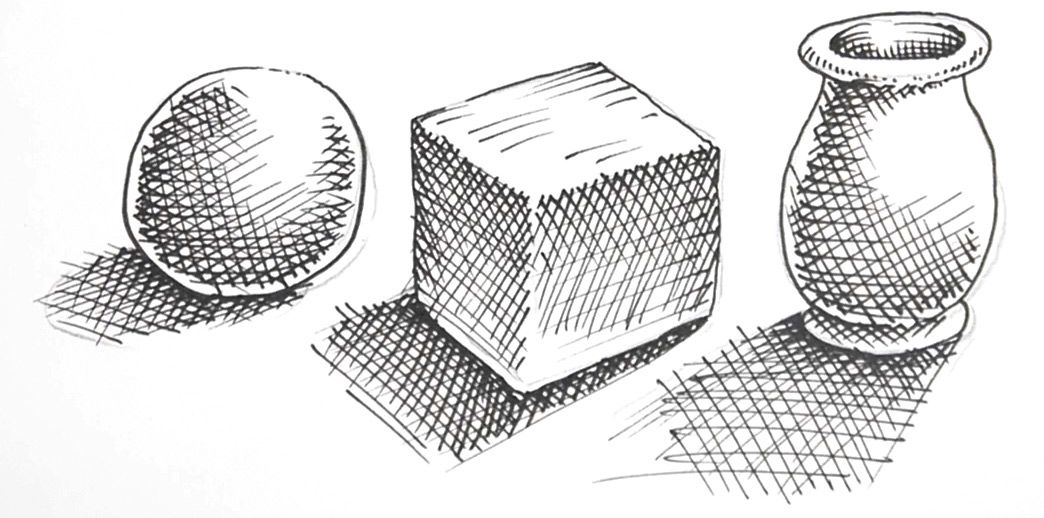
This process is somewhat similar to that of hatching. The main difference here is that a set of straight parallel lines will be drawn on top of the first. Cross-hatching helps to create darker shades, and the second set of lines could naturally blend in with the primary ones.
The second set of lines can be drawn in any direction or angle. However, ensure that you maintain consistency throughout.
Cross-hatching is the quickest way of giving a subject a sense of form, mainly geometric shapes. Since you are drawing straight lines, be extra careful not to bring flatness in areas where it is not meant to, such as human forms or curved objects.
3. Contour lines
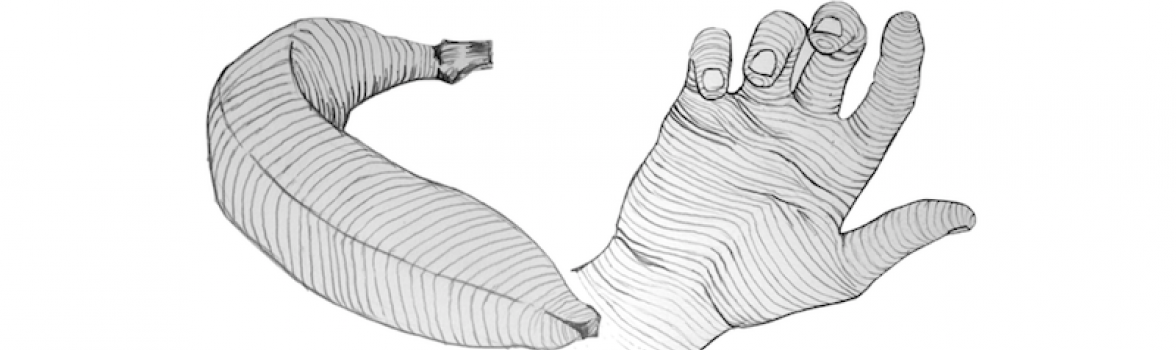
This form of shading works best when you are working on curved images where the technique of cross-hatching is not suitable.
Contour lines help to accentuate the curves on organically shaped subjects. Unlike cross-hatching, same lines are not replicated over and over again. Instead, the curved lines are gently transformed to build a refined appearance of the curved areas. To do this, you need to have a sense of strong visualization.
Contour lines are one of the quickest ways to draw objects that have natural forms.
4. Stippling
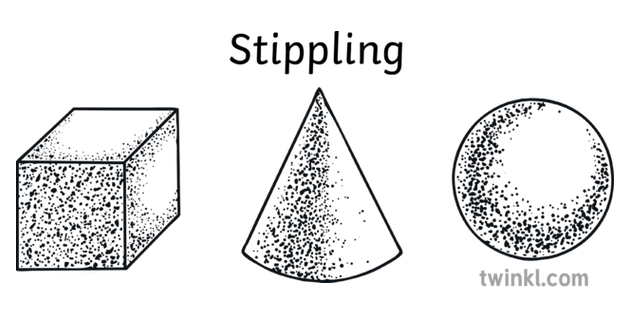
This is a drawing technique where areas of shadows and light are created using dots.
The basic idea is relatively simple. For lighter shades, you apply lesser number of dots that are far apart. On the other hand, densely packed dots are used for darker shades.
Stippling helps create realistic images, and in this process, the person itself is in control as a significant level of concentration is required in marking smaller dots.
Since this process can be time-consuming, make sure to use it only when absolutely necessary during your NATA architecture exam.
5. Weaving
Just like the name suggests, the whole idea is to create a weaving pattern with sets of interlocking lines.
While drawing, this requires a certain level of concentration. So make sure that you do not lose focus.
These lines can be either placed in an organized pattern or have no pattern at all. To start with, you could add the first set of lines and place the next group over it at a varied angle to have an intersecting effect.
6. Scribbling
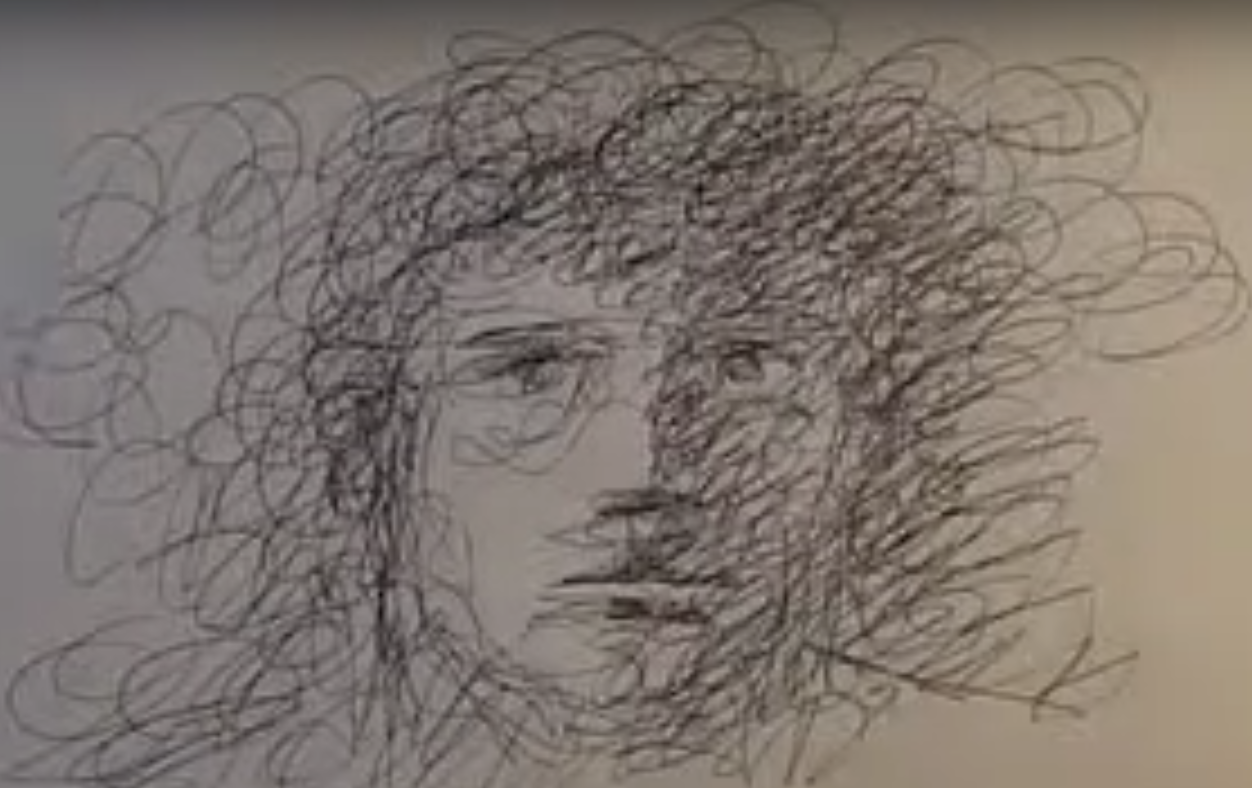
This is one of the most common shading techniques, and many of you might be already acquainted with this technique.
Scribbling is one of the most effective techniques to achieve the natural effect of overlapping elements.
To scribble, gently hold the pencil and move more organically and naturally. Try to create more loops and variety instead of making any specific shapes.
Sometimes it is noted that the shading can go overboard if you leave your hands more freely. So always be aware of your requirements and shade accordingly.
7. Slinky Pencil Shading
This is considered an easy technique to master, especially for beginners. Slinky pencil shading can be done by shading using back and forth motions with your pencil.
This shading method works well in creating sketches that don’t have too many details to fill.
You can eventually create a line that looks like a slinky.
8. Circlism pencil shading
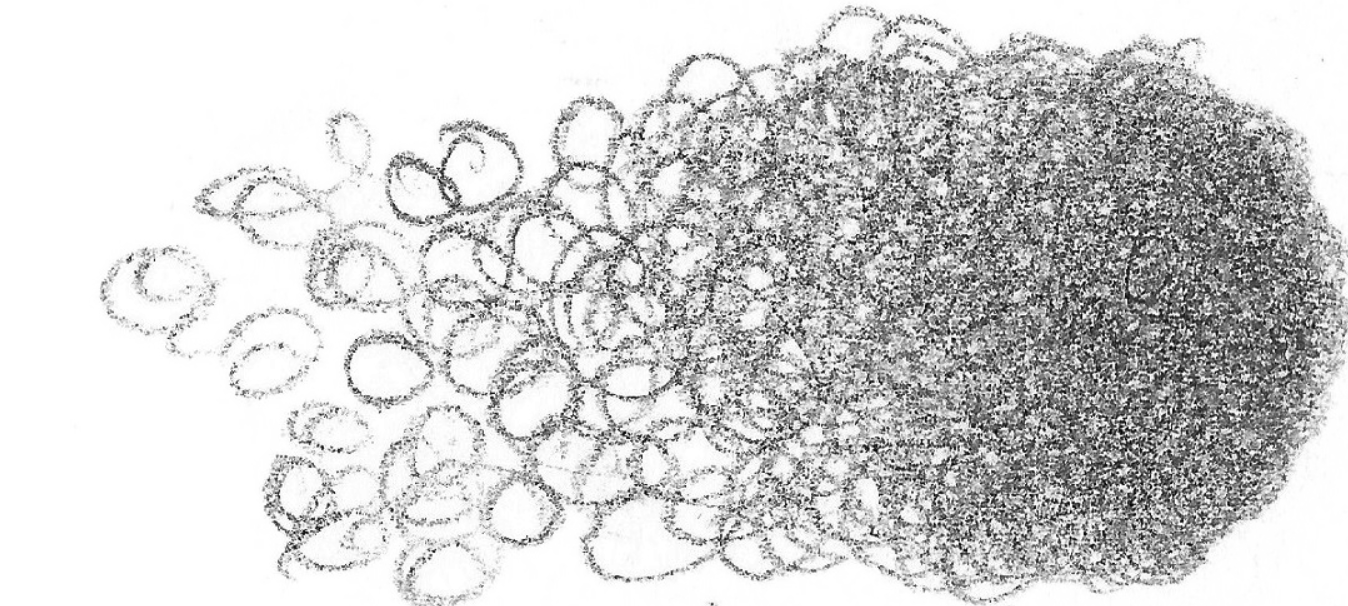
Here, shading is done by creating small circles. Darker shades are obtained by drawing smaller circles and lighter ones through larger circles.
Integrating different techniques of shading
In this article, we have mentioned several methods of shading. There are no hard and fast rules for choosing a particular style. It will essentially depend on the image that you are planning to sketch.
As most architecture students are already aware, pencils are available in different numbers such as 2B, 4B, 6B, 2H, 4H, etc. The harder pencils are marked H and B for softer pencils. While shading, you could mix different ranges of pencils to diversify your drawings and make them more realistic.
How to shade?
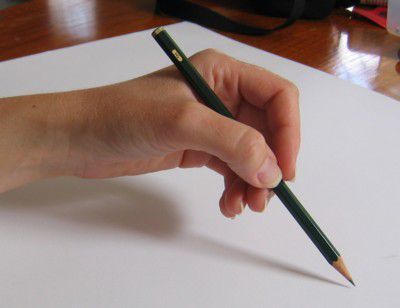
Unlike drawing, shading is effectively done with the side of a pencil tip. Hold your pencil at a slanting angle (45 degrees to be exact) and start moving the pencil with your wrist or your shoulders. This helps to produce different types of shades.
The harder you press the pencil, the darker the shades, and vice-versa.
Moving the pencil with your wrist helps produce smaller strokes and is best for small-sized drawings. On the other hand, moving the pencil with your elbows helps create larger and more expressive shades.
How to shade evenly?
At times you will have to shade certain portions of your drawing evenly. You can start by applying the pressure gently and increasing the pressure as you go on further.
By applying strokes in various angles, you could add greater luminosity to your shades.
- If you find it challenging to eliminate gaps in the shade, the best thing to do is to wear down your pencil until the tip is dull. You could also use the lead for shading.
- If you are shading a larger area, move your pencil’s tip slightly ahead from where you are holding it to increase the stroke length and apply pressure from your shoulders or elbow.
Shading for NATA-JEE architecture exam
Since your only choice is A-4 sheets for the architecture entrance exam, you need to practice shading on it as it lacks enough grip provided by the textured paper.
You could use some of the tips such as:
- Use stump technique or smudging to create an even shade.
- Use a softer grade pencil such as 2B.
To wrap up
When it comes to shading, the success mantra is to practice regularly. In this article, we have mentioned some of the essential shading techniques and how to successfully implement them in your sketches.
Some of the techniques mentioned could be relatively new for you. Try to implement them within your sketches, and over time, you could produce amazing sketches throbbing with life.
Consult our expert teachers and guides at Ignite Thrissur for further guidance.